Drywall Suspended Ceiling Applications
Elbette, Alçıpan Asma Tavan Uygulamaları hakkındaki kapsamlı makalenizi İngilizceye çevirebilirim.
The Key to Functionality and Aesthetics: A Comprehensive Guide to Drywall Suspended Ceiling Applications
Introduction: What is a Drywall Suspended Ceiling and What are its Contributions to Modern Architecture?
In modern interior designs, ceilings are no longer just structural coverings; they have become a vital design area where lighting, acoustics, and decoration are integrated. At the heart of this transformation are drywall suspended ceilings (also known as gypsum board ceilings).
A drywall suspended ceiling is a secondary ceiling system created by mounting gypsum boards (drywall panels) onto a metal framework suspended beneath the existing concrete ceiling. The void (plenum) created between the original ceiling and the suspended ceiling allows for:
Concealing installations like electrical cables, ventilation ducts, and plumbing.
Contributing to thermal and sound insulation.
Offering decorative aesthetics through light coves, spotlights, and custom design details.
Why Are Drywall Suspended Ceilings So Popular?
Design Flexibility: Beyond flat ceilings, they can easily be transformed into hundreds of different architectural forms such as oval, circular, stepped (cove ceiling), hidden light coves, and niches.
Cost-Effectiveness: They are generally more economical than other ceiling systems, both in terms of material and labor.
Fast Application: Installation and finishing are relatively quick, which shortens project delivery times.
Fire Resistance: Specific types of drywall panels can provide high fire resistance, enhancing building safety.
Smooth Surface: They offer a perfectly flat and smooth surface ready for paint and other finishing treatments.
Basic Application Stages: Step-by-Step Installation Guide
A drywall suspended ceiling application, when executed correctly, is a durable system that prevents cracking issues. This process involves fundamental stages that require expertise and precision:
1. Planning, Measurement, and Level Determination
Space Analysis: The ceiling drop distance (level) is determined by considering the density of installations, the depth of lighting fixtures, and the existing ceiling height. Hidden lighting applications typically require a drop of at least 15–20 cm.
Project Design: It is clarified whether the design will be flat or stepped. Design details (light cove width, step depth, etc.) are transferred to the drawing.
Perimeter Profile Mounting: U or L profiles are fixed to the perimeter of the room with screws and anchors, using a spirit level or laser for precise leveling according to the determined height.
2. Installation of the Load-Bearing Structure (Framing)
A sturdy metal frame is built to bear the weight of the drywall panels.
Hanger System: Suspension elements (adjustable hangers) and steel anchors are mounted to the existing concrete ceiling. Hanger spacing is determined according to standards based on the profile and drywall thickness used (typically at 90–100 cm intervals).
Main Carrier Profiles (C Profiles): C profiles are attached to the hanger system, and the ceiling's flatness is ensured. These profiles are the main load-bearers for the entire ceiling system.
Secondary Profiles (H Profiles): Secondary profiles, where the edges of the drywall will align and be screwed, are connected to the main carriers using clips (crossovers). The spacing between these profiles should be 50–60 cm for optimal drywall screw spacing.
3. Preparation of Installation Works
Before covering the ceiling with drywall, all electrical, ventilation, fire detection, and sound system cables in the ceiling void must be routed and secured without damaging the suspension system.
4. Mounting the Drywall Panels
Panel Fixing: Standard-sized drywall panels (usually 120x250 cm) are fastened to the carrier system with special drywall screws. Screws should be recessed slightly below the surface and placed at least 1 cm from the panel edge.
Cutting Work: Areas where holes for lighting, grilles, or chimneys will be opened are marked and cut precisely.
Gap Allowance: It is important to leave 3–5 mm expansion gaps between panels and at the wall edges to prevent potential expansion and contraction.
5. Joint Compound and Surface Finishing
This stage determines the final aesthetic appearance of the ceiling and prevents cracking.
Joint Tape Application: Self-adhesive mesh tape or the higher quality paper joint tape is applied to the joints of the drywall panels to prevent cracking.
Joint Filling: Special joint compound is applied over the tapes and screw heads. This process may be done in multiple layers, allowing for full drying in between, until the surface is perfectly smooth.
Sanding and Priming: The dried compound is sanded smooth. Finally, a quality primer is applied to equalize the varying absorbency of the drywall before painting.
Types of Drywall Suspended Ceilings and Design Ideas
Beyond standard flat ceilings, drywall suspended ceilings allow for a wide variety of designs that add character to the space.
Popular Design Solutions:
Flat Suspended Ceiling: The most basic and simple model. Used to conceal installations and create a smooth surface. It is integrated with spotlights.
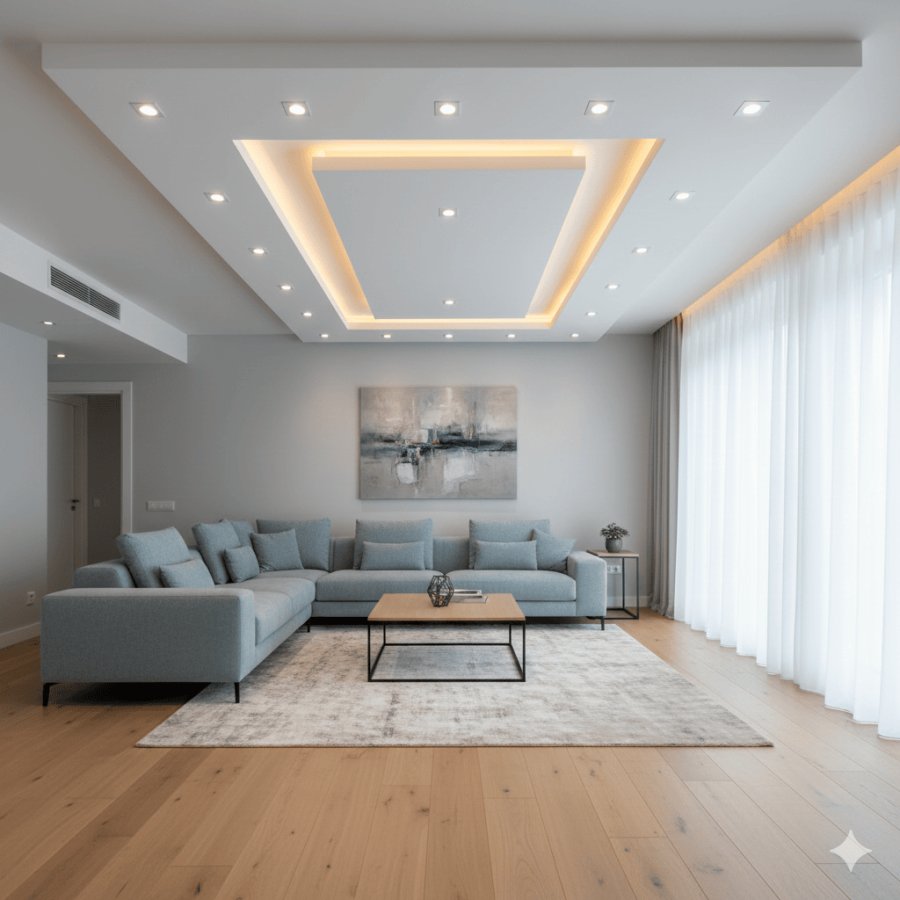
Stepped / Cove Ceiling: A raised area (cove/tray) is created in the center of the ceiling. Hidden light strips (LEDs) are placed along the edges of these steps to add depth and a dramatic lighting effect to the space.
Hidden Light Cove (Light Trough Ceiling): Applied by creating niches only on the perimeter of the ceiling or in custom forms, this system completely conceals the light source, providing soft, ambient illumination that reflects off the wall or ceiling.
Geometric and Curvilinear Forms: Circular, elliptical, or free-form designs create an artistic effect, especially in prestigious areas like lobbies, living rooms, or hotel entrances.
Acoustic and Insulated Ceilings: Acoustic performance is enhanced by adding sound insulation materials like rock wool/glass wool between or on top of the drywall panels, especially for cinema rooms, meeting rooms, or to reduce sound transmission between apartments.
Quality and Safety: Tips for Long-Lasting Application
In line with Google's E-A-T (Expertise, Authoritativeness, Trustworthiness) principles, here are the engineering details to consider for a quality drywall suspended ceiling:
Correct Material Selection:
Standard (White) Drywall: For dry and normal humidity areas (living rooms, offices).
Moisture-Resistant (Green) Drywall: For areas exposed to high humidity, such as bathrooms and kitchens.
Fire-Resistant (Red) Drywall: For areas where fire safety is paramount, such as escape corridors and boiler rooms.
Crack Prevention Techniques: Establishing the ceiling frame at standard intervals, using the correct joint tape (preferably paper tape), and applying the joint compound in layers, allowing for full drying, minimizes the risk of cracking.
Expansion and Movement: In large areas (larger than 40–50 m²), expansion joints must be left to accommodate thermal expansion and prevent cracking.
Profile Thickness and Galvanization: The thickness of the metal profiles (U and C) and their rust-resistant galvanized coating form the foundation of quality workmanship.
Evaluation from a Cost and Economy Perspective
While drywall suspended ceilings have a relatively low initial cost, the total cost is influenced by the following factors:
Design Complexity: Flat ceilings are the most affordable. Stepped, curvilinear, and detailed hidden light designs increase labor and material costs.
Panel Type: Special panel types like green or red drywall are more expensive than standard white panels.
Lighting Integration: The cost of LED strips, spotlights, transformers, and their electrical installation constitutes a significant part of the total budget.
Insulation Needs: Adding rock wool/glass wool for thermal or sound insulation increases material costs but provides long-term gains in energy efficiency and comfort.
Conclusion: Redefine Your Living Spaces with Drywall Suspended Ceilings
Drywall suspended ceiling applications are an indispensable solution that combines aesthetics and functionality in today's construction standards. They are unmatched for concealing installations in the ceiling void, integrating lighting, and ensuring acoustic comfort in both the renovation of existing structures and new construction projects.
For the success of your project, it is critical to work with expert craftsmanship that minimizes the risk of cracking and avoids compromising material quality (using quality profiles and joint tape). A correctly installed drywall suspended ceiling will add a modern, organized, and personalized atmosphere to your space.
Frequently Asked Questions (FAQ)
Why does cracking occur in drywall suspended ceilings, and how can it be prevented?
Cracking usually results from inadequate or faulty joint workmanship and low-quality carrier frame profiles. To prevent it: Use paper joint tape, apply the joint compound in layers allowing them to fully dry, and ensure the ceiling frame is installed sturdily and at standard intervals.
Can drywall suspended ceilings be installed in bathrooms and humid areas?
Yes, they can. However, moisture-resistant (green) drywall panels must be used in such wet and humid areas. Standard (white) drywall will swell and deform when exposed to moisture.
How much should the suspended ceiling be dropped?
This depends entirely on the height of the installations to be concealed in the ceiling void. For a flat ceiling and only spotlighting, at least 10–15 cm may be sufficient. If there are hidden light coves, ventilation ducts, or large grilles, the drop distance should be 20–30 cm or more.